Associate an existing invoice
To link with an invoicing program, you need at least a Keeping Plus subscription. A separate invoicing program account is required.
In this example, we use the invoicing program Moneybird. This article also applies to other invoicing integrations.
Ensure your invoicing system is linked to your Keeping organisation See instructions for your specific invoicing program.
Associating an existing invoice with your hours is quick and easy. The results are immediately visible in your organisation’s reports.
The Invoice Overview
Navigate to your organisation’s invoice overview and click the Associate button:
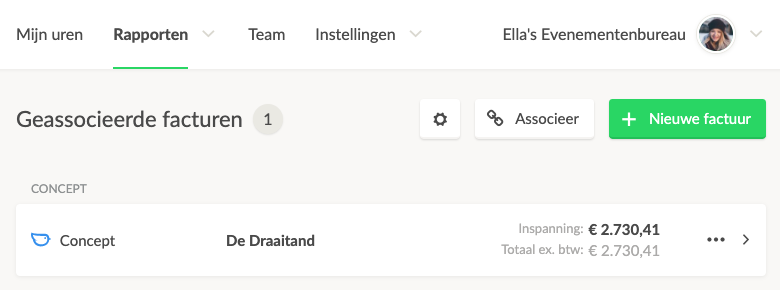 (Found under Reports → Invoices)
Associate an Invoice
Once you click the Associate button, you’ll see the screen below. Here, you can view invoices that can be linked to your time tracking. Use the (···) button and click Associate with hours in Keeping.
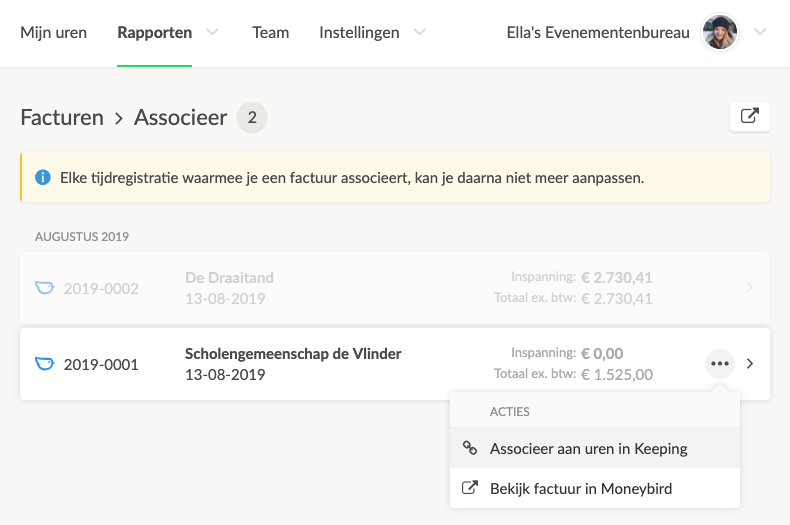 Note: Only sent invoices can be associated.
The Invoice Screen
The invoice screen initially shows no hours; you can now make a time selection to determine which hours will be linked to the selected invoice.
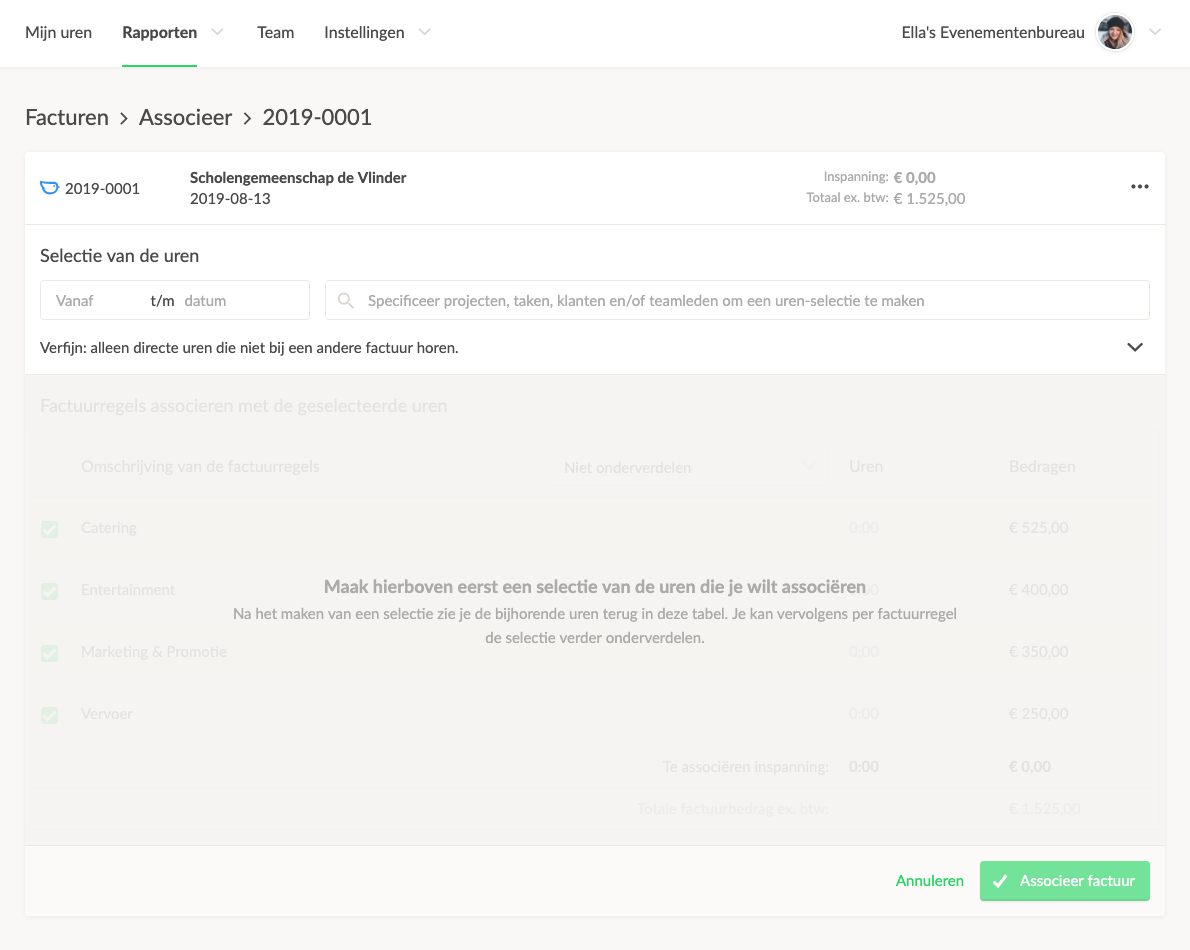
Specify Hours
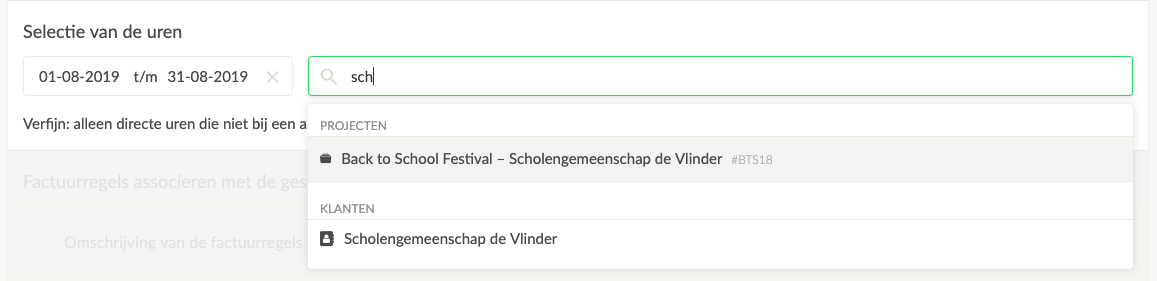
Start by specifying a date range; without a date range, all relevant hours will be included. Then specify the hours you want to associate with the invoice. You can select hours based on projects, clients, tasks, and team members.
Extra Options
You can further refine your selection using additional options:
 Here, you can include previously invoiced hours in this invoice or choose only non-invoiced hours. You may also choose to exclude previously invoiced hours with this integration (helpful if you’ve added multiple invoicing systems to your organisation). Additionally, you can decide whether to include indirect hours in this invoice or only direct hours.
Read more about direct/indirect hours.
Here, you can include previously invoiced hours in this invoice or choose only non-invoiced hours. You may also choose to exclude previously invoiced hours with this integration (helpful if you’ve added multiple invoicing systems to your organisation). Additionally, you can decide whether to include indirect hours in this invoice or only direct hours.
Read more about direct/indirect hours.
Subdividing the Invoice Lines
A key part of specifying your invoice is deciding on the subdivision of invoice lines, which adds significant detail to your invoicing.
A breakdown by task, in this case, looks as follows:
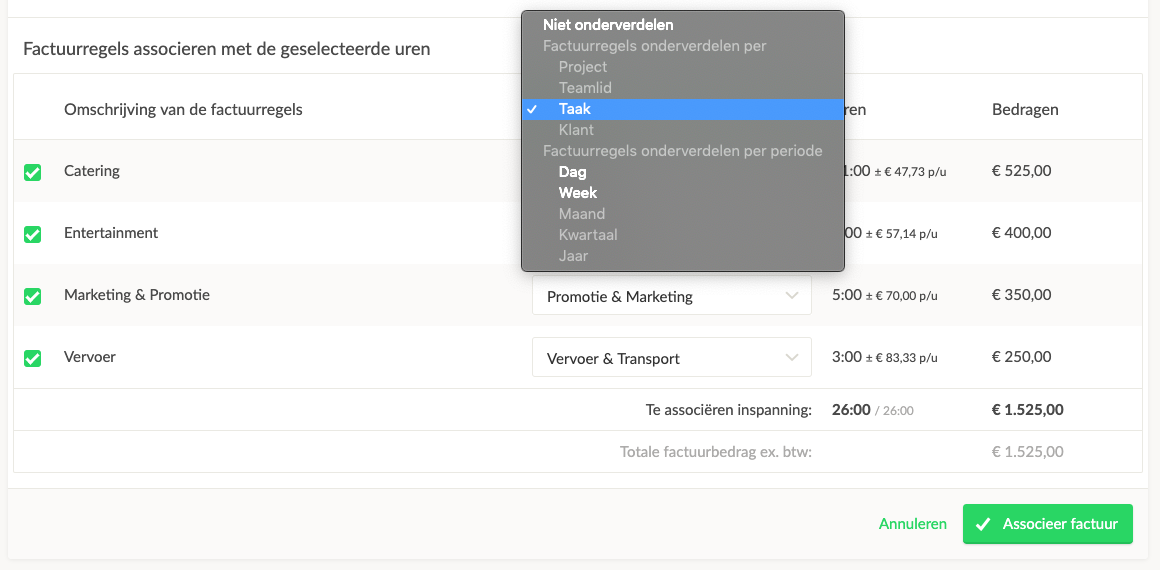 Gray options are omitted because an invoice may be limited to a specific project/client or team member. Depending on the time selection period, a period breakdown is also enabled. Choosing no subdivision means the invoice is evenly split across different invoice lines.
Associating the Invoice
Once you’ve refined the selection to your liking, simply click the green Associate Invoice button.
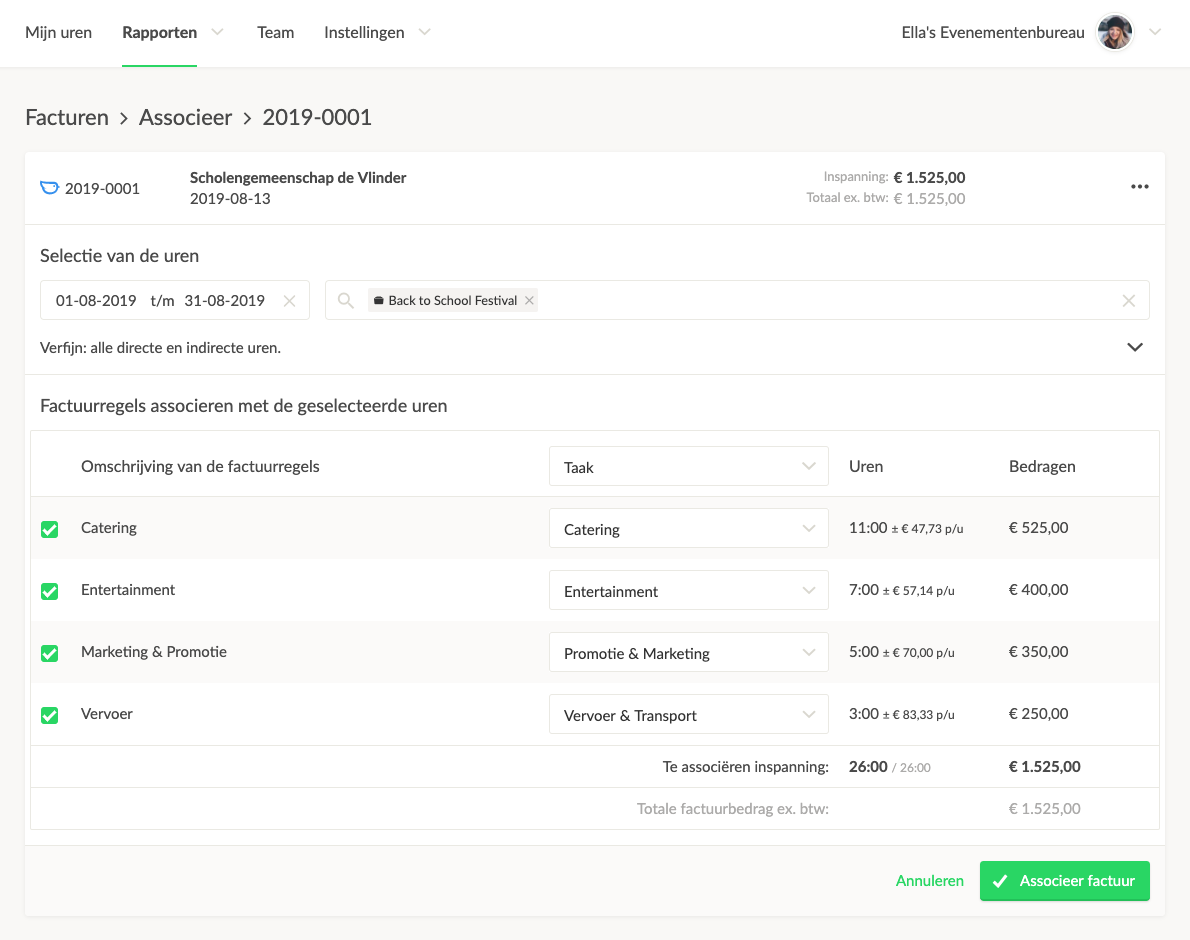 Note: Once you click the Associate Invoice button, all time entries relevant to this invoice are automatically locked. This means they can no longer be modified.
Congratulations! You’ve now associated your first existing invoice with hours in Keeping. Read more about our integrations with invoicing programs.