Create a new invoice in Twinfield
Note: the integration with Twinfield currently only works with Twinfield Classic invoices. Twinfield does not yet allow developers to create integrations for the modern invoices.
For this integration, you need a Word template that you set up in your Twinfield environment. Do this via Sales → Word Templates. Download here an example of a valid Word template.
Make sure a VAT code VH is available for sales invoices. Keeping also requires a Twinfield invoice type with the code UREN, for VAT-exclusive invoices. Both the VAT code and invoice type are included by default in new Twinfield administrations.
To connect with an invoicing program, you need at least Keeping Plus. Additionally, a separate Twinfield account is required. The necessary Twinfield subscription is not included.
After you link Keeping and Twinfield, you can create Twinfield invoices directly from Keeping.
Creating an Invoice
You can create a new invoice in different ways, for example, via the New Invoice button in the invoice overview screen. You can also use the toolbar in reports to use the current report overview as input.
In the example below, we create an invoice via Invoices.
 In the associated invoices overview, we use the New Invoice button.
The Invoice Screen
First, select the integration you want to use for invoicing from the top right. Then select the hours for which you want to create the invoice:
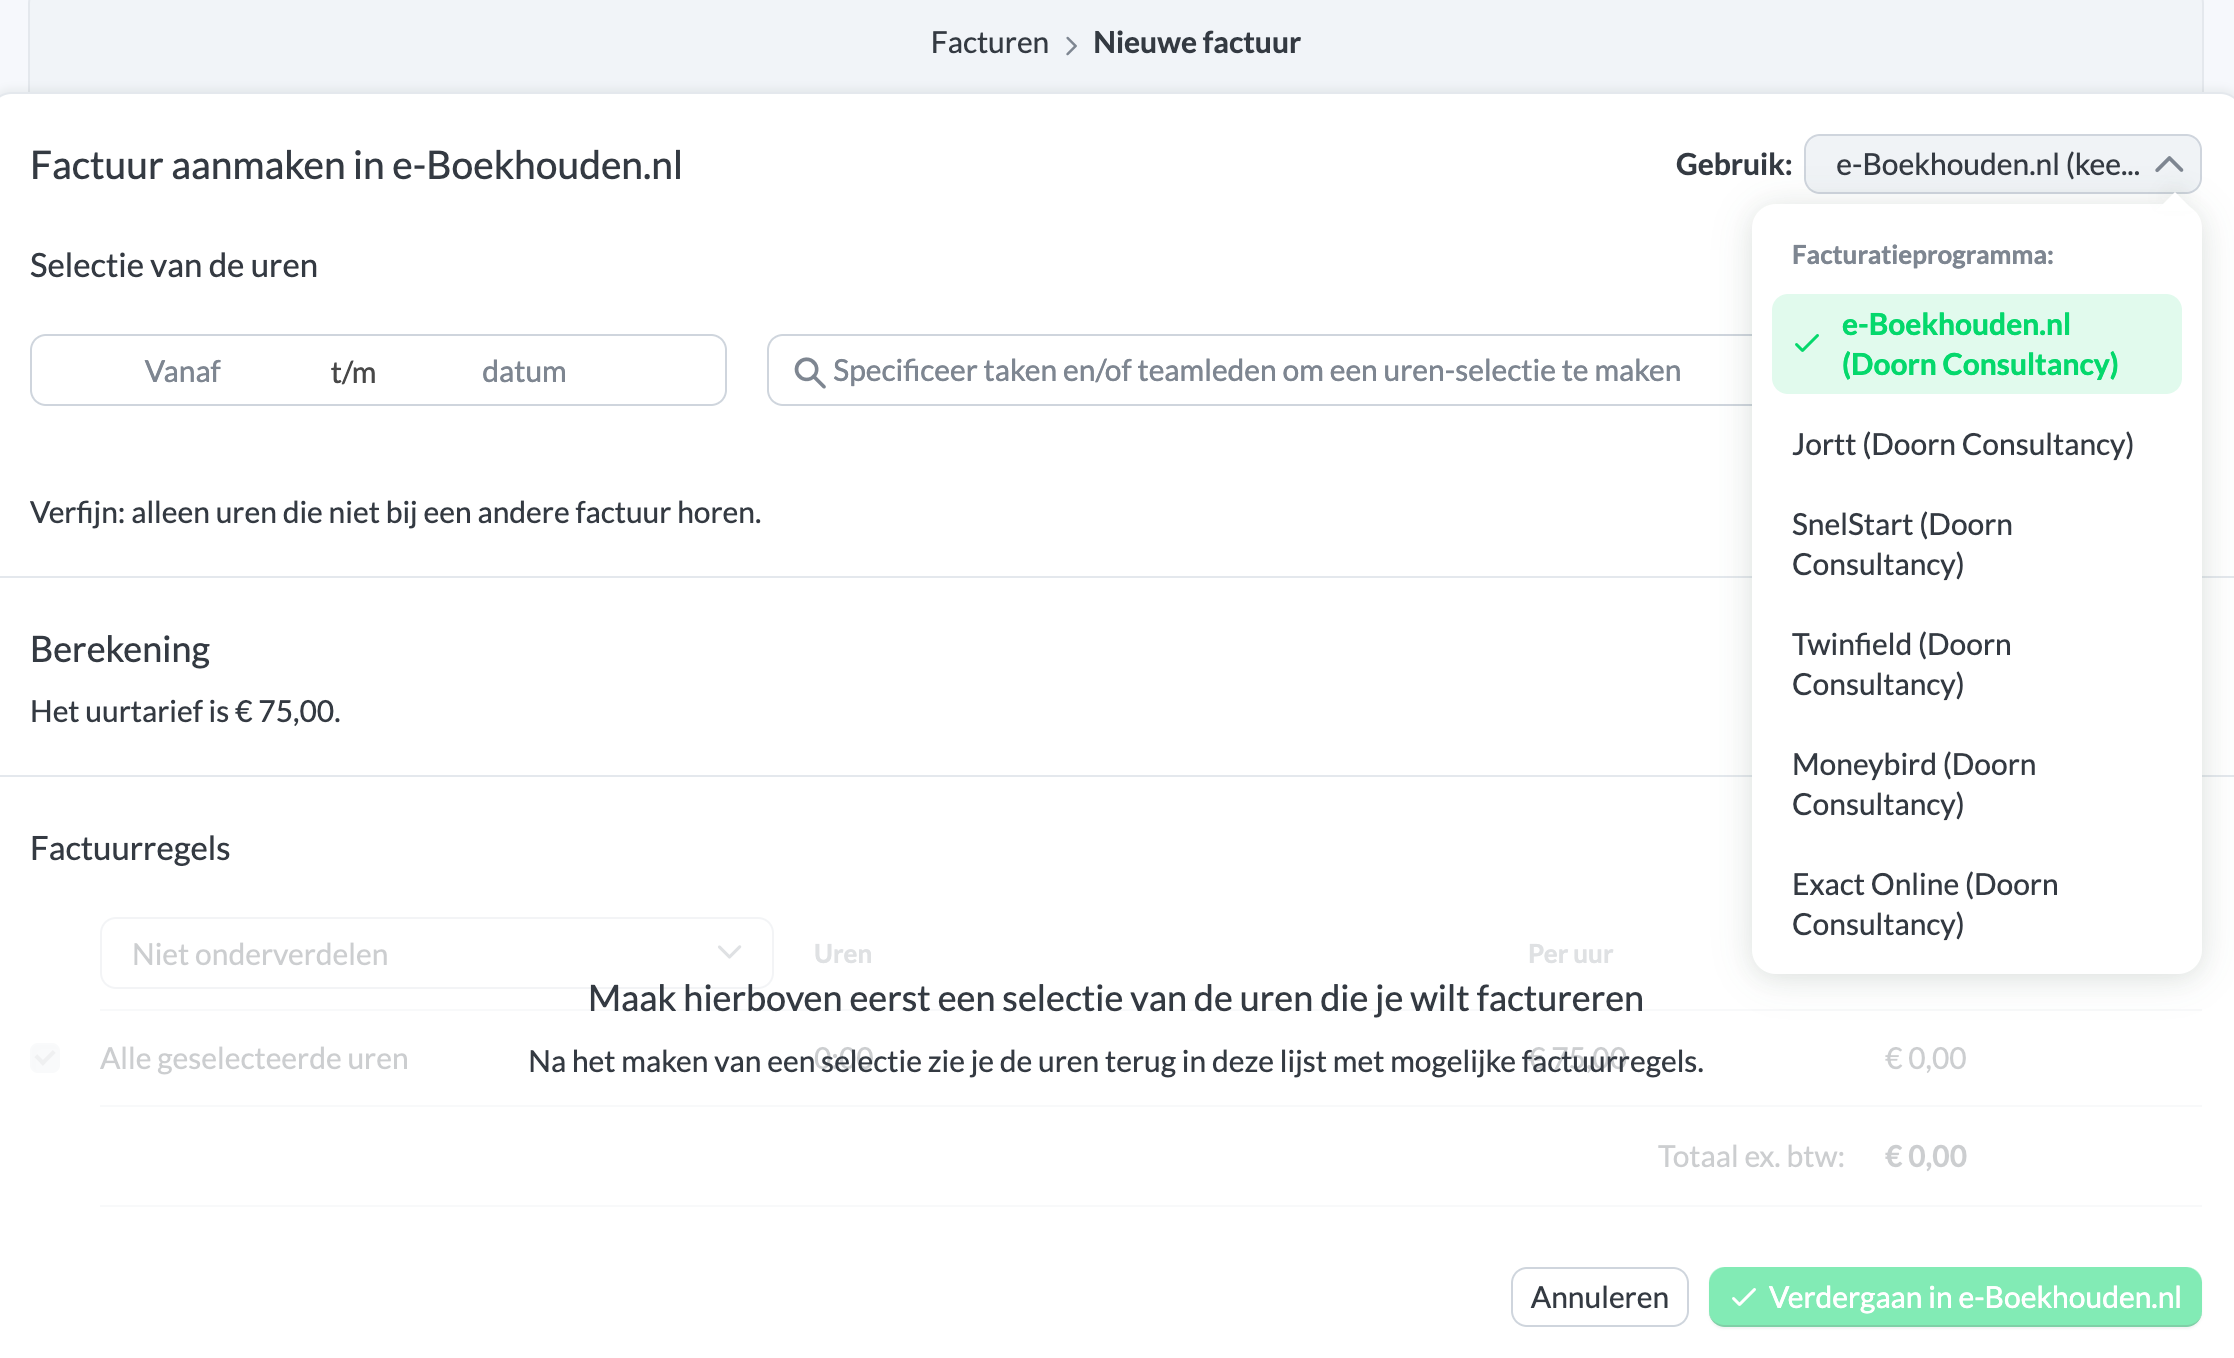 This screen displays all details of the hours relevant to your created invoice. You can refine your selection by selecting the date range, projects, clients, tasks, and team members.
Extra Options
Additionally, you can use extra options to further refine your selection:
 Here you have options to include previously invoiced hours in this invoice, or only include non-invoiced hours. You can also choose not to include hours already invoiced with this integration (useful if you add multiple administrations to your organisation). You can also select whether to include indirect hours in this invoice or only direct hours.
Read more about direct/indirect hours.
Here you have options to include previously invoiced hours in this invoice, or only include non-invoiced hours. You can also choose not to include hours already invoiced with this integration (useful if you add multiple administrations to your organisation). You can also select whether to include indirect hours in this invoice or only direct hours.
Read more about direct/indirect hours.
Determining the Invoice Amount
You can set your rate in various ways.
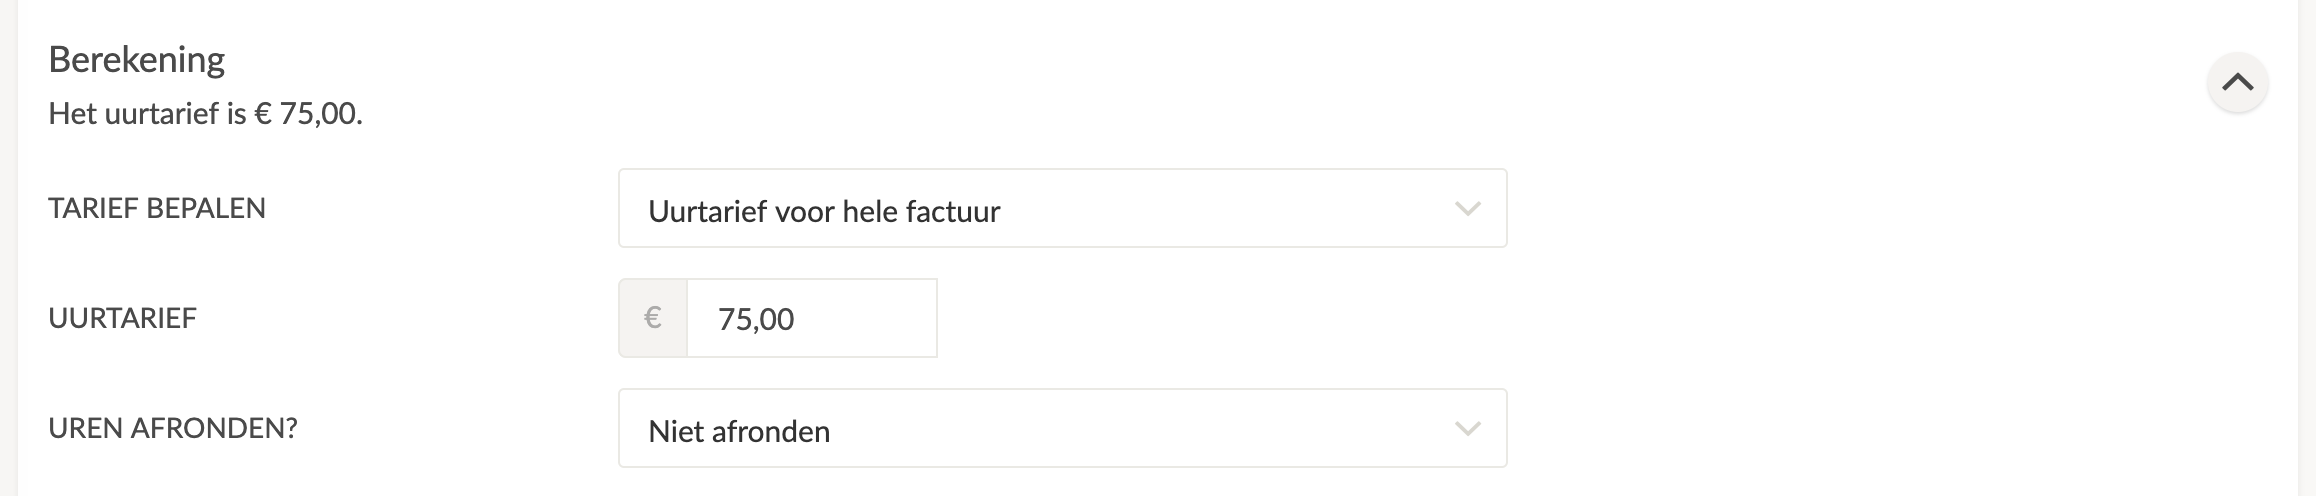 Choose how the rate is determined:
- Hourly rate for the entire invoice, where all hours are billed at the specified hourly rate;
- Hourly rate per invoice line, specifying an hourly rate per line;
- A fixed amount per invoice line;
- A total amount for the entire invoice.
Additionally, you can choose whether to round hours to whole hours, half hours, quarters, 10 minutes, or 5 minutes. Of course, you can also choose not to round hours.
Dividing the Invoice Lines
An important part of specifying your invoice is determining the breakdown of the invoice lines. This provides significant detail to your invoicing.
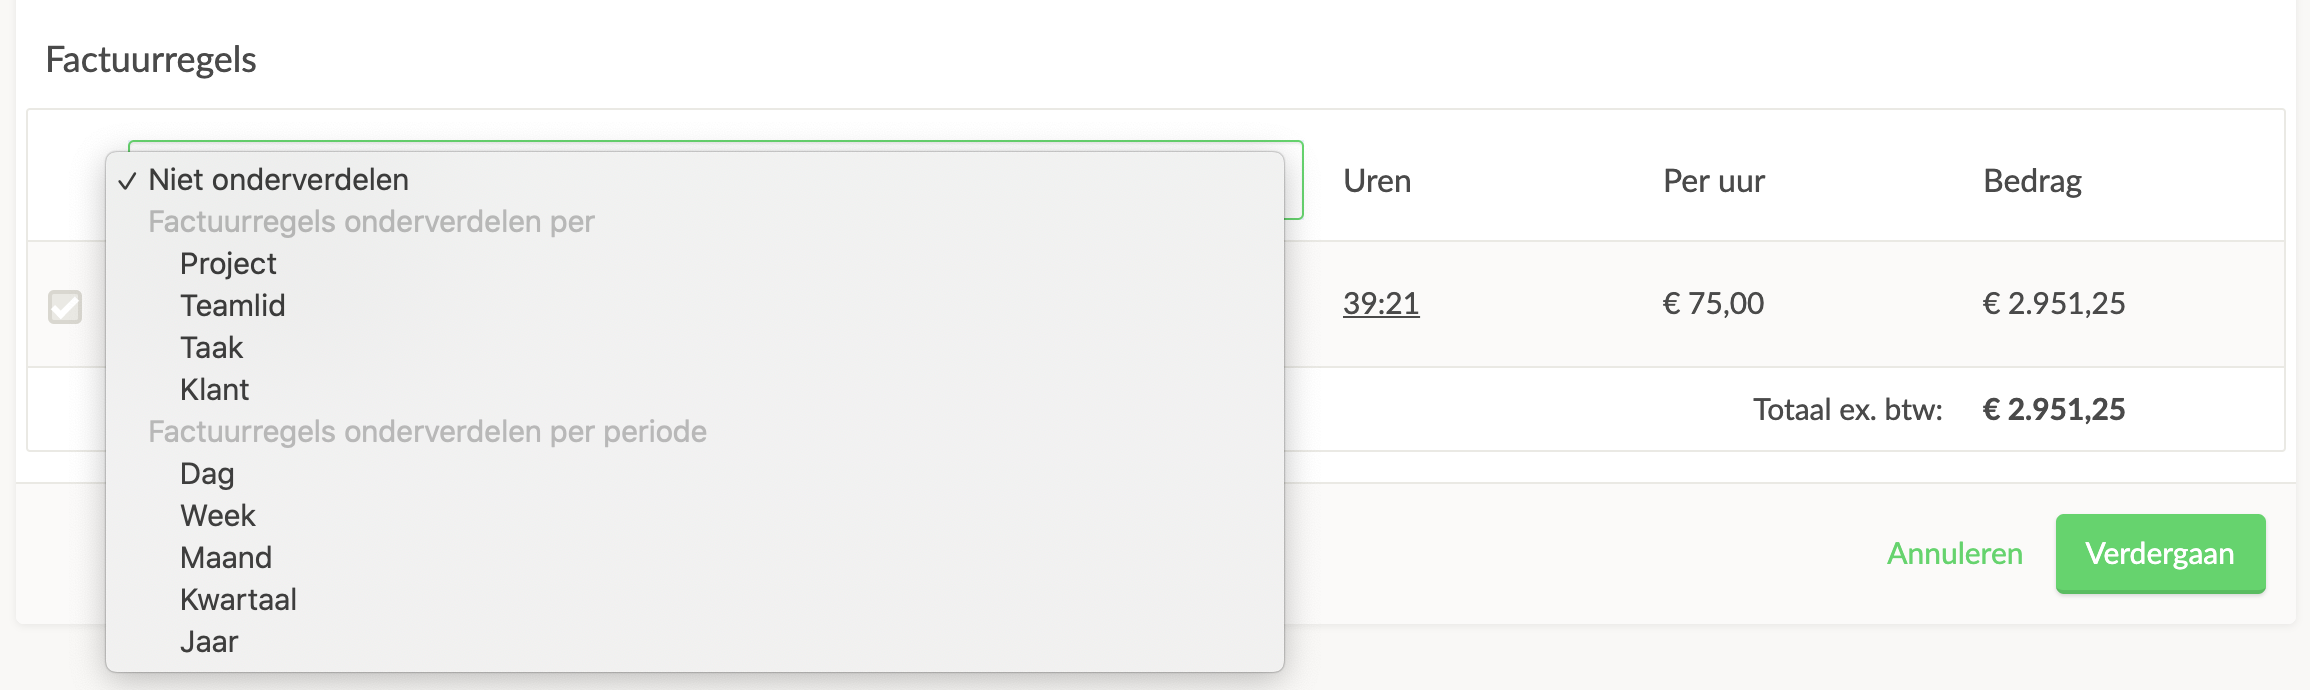 You can choose to divide your invoice by project, team member, task, or client. Alternatively, you can also divide the invoice by period, such as days, weeks, months, quarters, or years.
A breakdown by task, with an hourly rate per invoice line, looks like this:
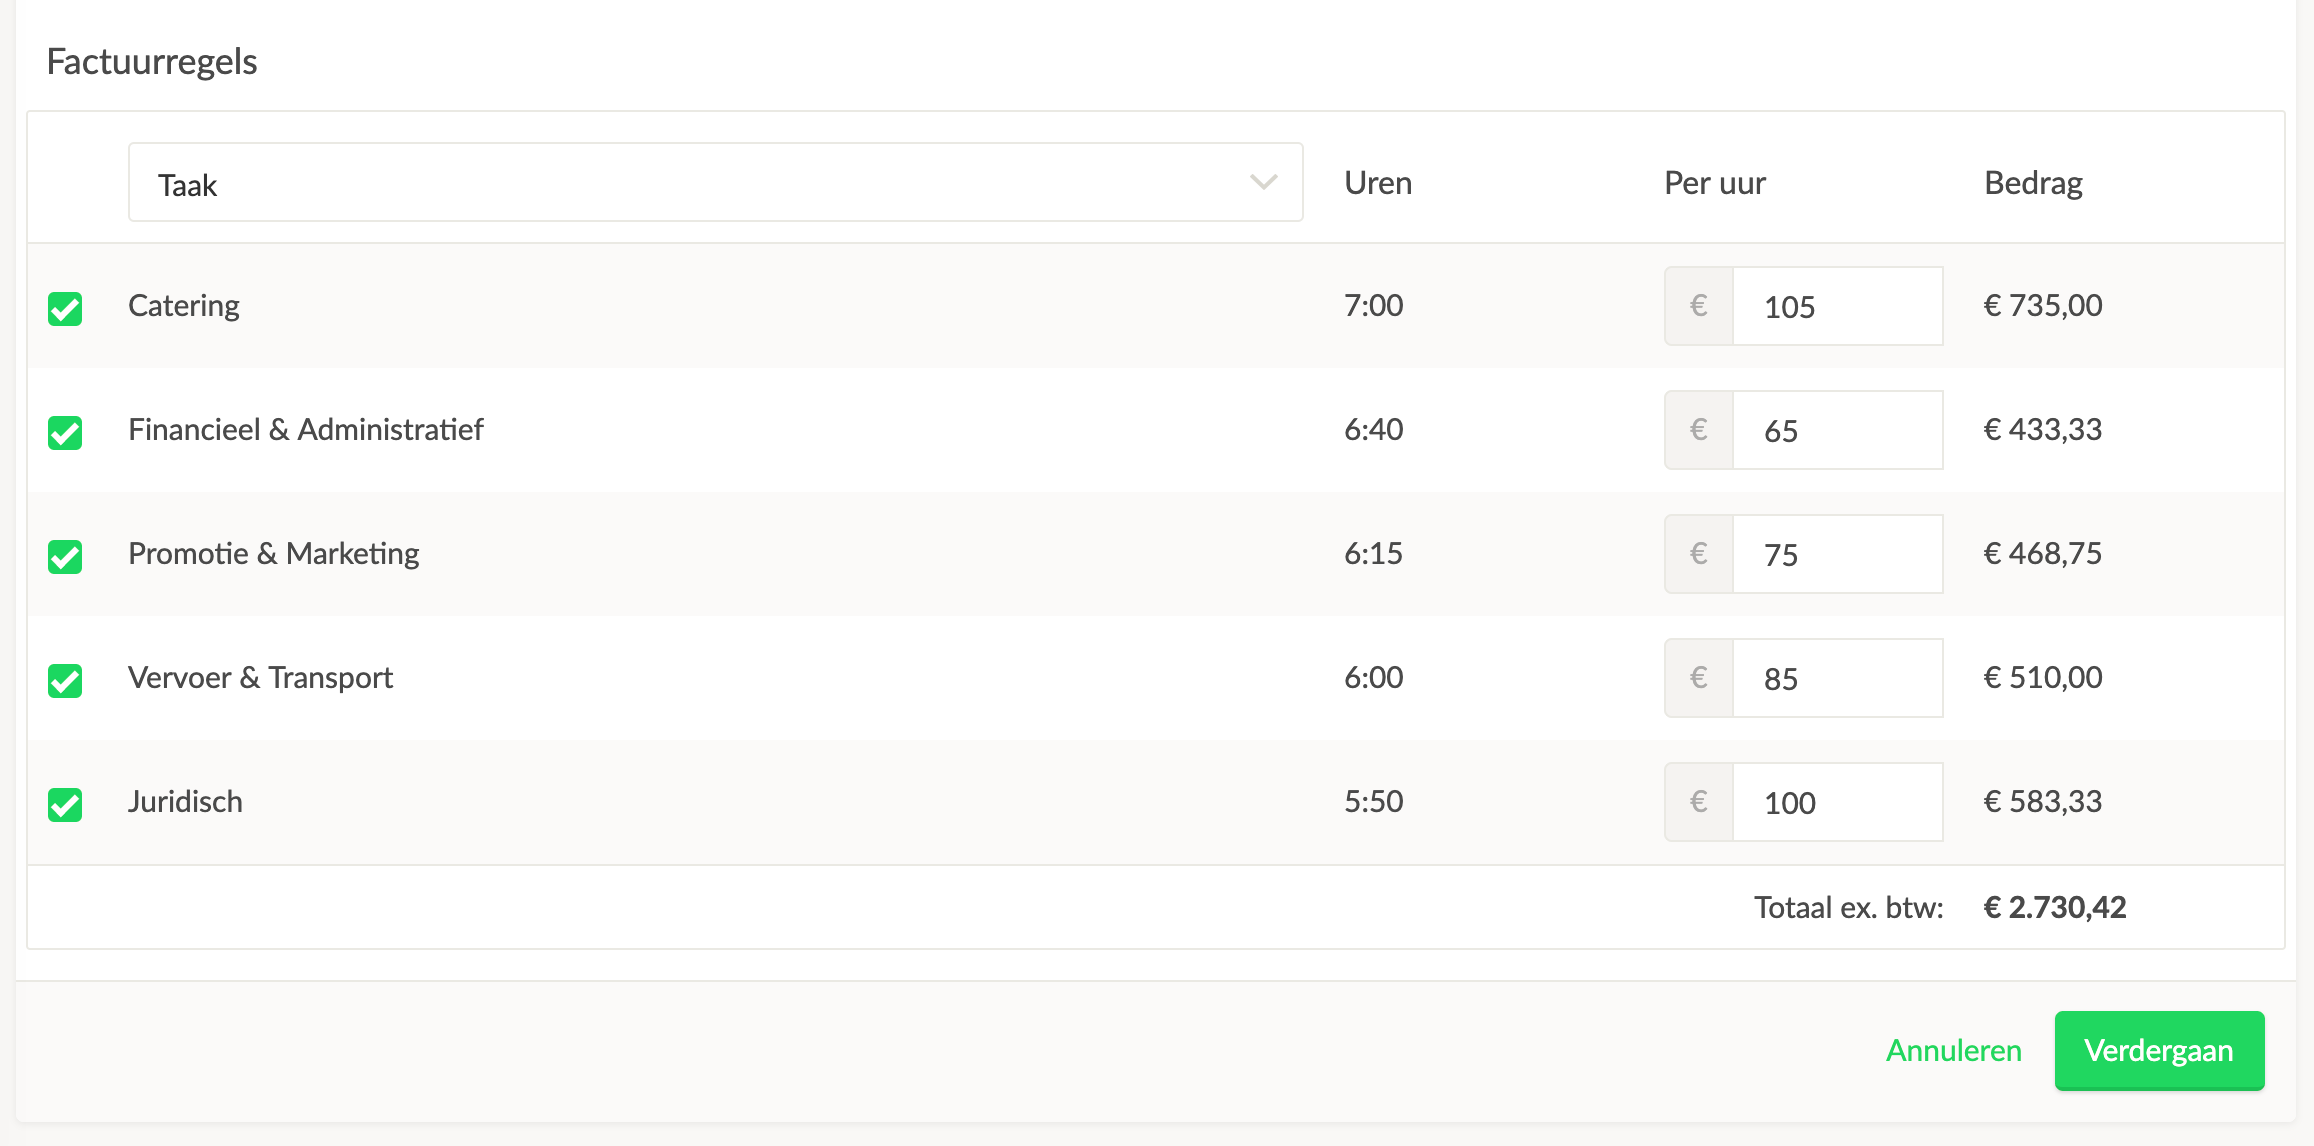 Once you’ve finished selecting hours, you can click Continue in Twinfield.
To Twinfield
You will then be redirected to your Twinfield environment, where you can review the invoice before sending it. Note that the invoice still needs to be sent.
Back to Keeping
Once you navigate back to Keeping, you’ll immediately see the invoice income reflected in the respective report. This makes it very easy to see how your registered hours compare to your invoiced hours.
On the Twinfield page, you can learn more about our integration with Twinfield.