Integrate with Exact Online
To link with an invoicing program, you need at least a Keeping Plus subscription. Additionally, a separate Exact Online account is required. Any required Exact Online subscription is not included.
With Keeping, you can link your organisation to one or more administrations in Exact Online. This allows you to easily connect time entries from Keeping with invoices from Exact Online.
Setting Permissions in Exact Online
To create an invoice, it’s necessary to assign the correct permissions to the account with which you log into Exact Online. Follow these steps:
- Go to Administration Name > Master Data > Users > Overview. Click on the name of the user for whom you want to assign or remove permissions.
- In the Monitor section, click on the "Permissions" link.
- Select the roles you want to assign and deselect those you want to remove.
- Click "Save."
For more information on adjusting permissions, see the Exact Online knowledge base. The minimum required permissions include:
- Sales / Enter invoices
- Sales / Print and process invoices
- General / Manage items
- General / View item data
- Financial / Manage accounts
- Financial / View accounts
If you cannot modify these settings yourself, please contact your administration’s administrator.
Getting Started with the Integration
Navigate to the integration settings for your Keeping organisation via Settings > Features > Integrations.
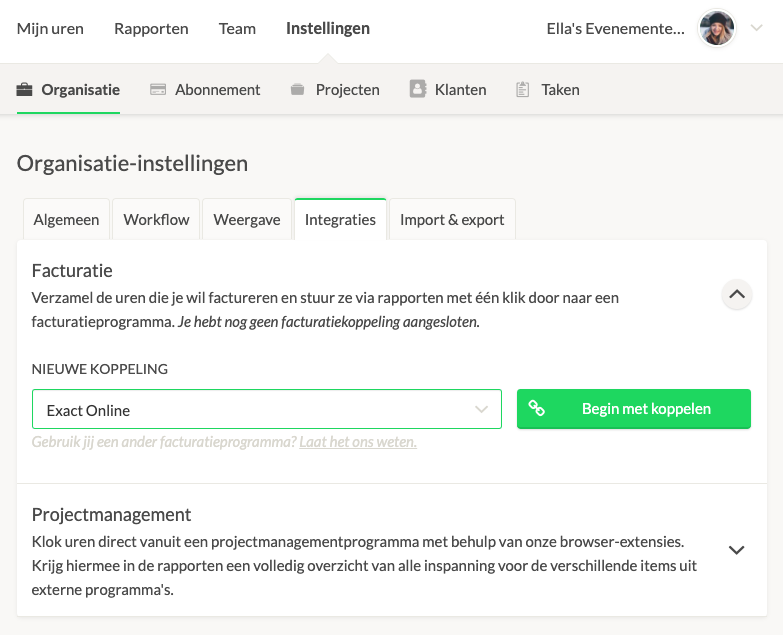
Next, click to continue to connect. 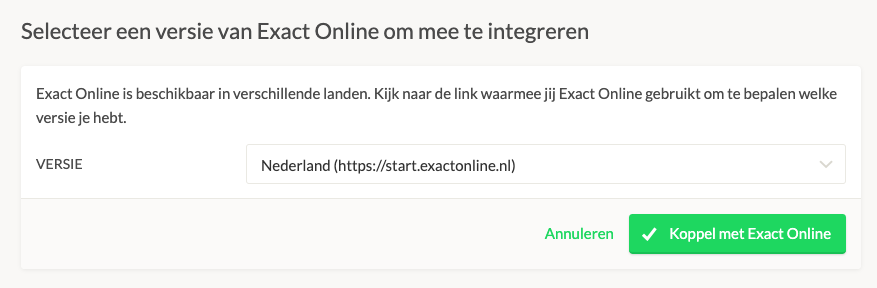 . We currently only support the Dutch (https://start.exactonline.nl) version.
You can check which version you are using by looking at the URL of your Exact Online. Keeping currently supports four versions: Netherlands, Belgium, United Kingdom, and United States. Keeping does not support the German or Spanish versions. Are you using another version of Exact Online? Let us know at [email protected].
Granting Permission for the Integration
After clicking the green "Start Connecting" button, you will be redirected to the Exact Online environment where you can grant Keeping permission to connect with your Exact administration (you may need to log in with your Exact account first).
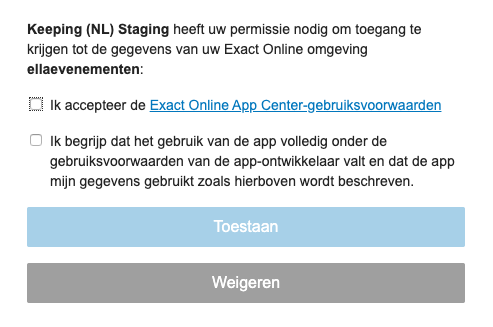
(Click the blue Allow button)
View Linked Exact Online Administrations in Keeping
You will then be redirected back to your Keeping environment. Here you will see that the link with Exact Online has been successfully established. Confirm this by looking at the overview under Current Invoice Links.
Keeping does not connect your tracked hours in Keeping with projects or hours in Exact Online, nor does it synchronize with Exact Online hours. For best results, use Keeping for time tracking and Exact Online for invoicing based on these hours.
Congratulations! Your Keeping organisation is now linked to your Exact Online administration. You can now, for example, create an invoice in Exact Online based on hours in Keeping. You can also link an existing invoice from Exact Online to specific hours in Keeping.
Before using Keeping with Exact Online, please note the following settings in Exact Online:
- Make sure you have an open fiscal year.
- Ensure you have a default sales item group.
Linking Multiple Organisations
If you wish to link with multiple administrations simultaneously, this is possible. Repeat the steps from Getting Started with the Integration for each additional administration you want to connect.
For more details on the connection with Exact Online, visit the Exact Online page.
Troubleshooting Connection Issues
If you encounter issues with the connection, check the app permissions in Exact Online by following these steps:
- Log in to Exact Online.
- Click on your login name (upper right corner of the screen with the dropdown arrow).
- Click on My Exact Online > Go to Security Center.
- Scroll down to the "Permissions for my apps" section. Click on the Keeping app.
- Click "Manage Administrations" in the lower right.
- Select the desired administration by checking it in the "Available administrations" column.
- Then, click the right arrow to move the administration to the "Selected administrations" column.
- Click "Save and Close."